I spent 8 years of my life working as a barista. Needless to say, after I quit, I really missed having access to constant lattes. I love a good cup of hot or iced coffee every once in a while, but in my opinion, nothing compares to a good latte. I’m also not the type of person who wants to spend $5+ on a latte (or 2) at a coffee shop every day. So I figured my best bet was to learn how to make a latte at home! I’m sharing with you how to easily whip up an iced or hot latte, from the comfort of your own home (without breaking the bank.)

How to Make a Latte at Home
Let’s start off with the basics – how to make a hot latte at home. While I typically opt for the iced latte route, because I live in Florida and 90% of the time it’s too hot for a hot latte… I think that people typically think of the hot version first when they think of a latte.
They’re both pretty easy to whip up when you have the right items. But a hot latte does take slightly longer due to heating up the milk (or non-dairy milk.)
For a quick step-by-step video tutorial of how to make an iced latte at home (+ my vegan coconut macaroon latte recipe) check out the video below!
If you enjoyed the video, be sure to like & subscribe to our YouTube channel. We post health & fitness videos (& fun videos like this one!) every Friday at noon. We’d love to see you over there!
Let’s get into how to make hot and iced lattes at home…
How to Make a Hot Latte at Home

1. steam your milk
First things first, you’ll need to figure out which option you want to use to warm up your milk. You have a few options to choose from:
- Stovetop
- Microwave
- Milk steamer
Any option is perfectly fine, it just comes down to personal preference and what you have in your kitchen. I personally like using a milk steamer the best, because I find it’s easier to get it to just the right temperature. However, with a bit of trial and error, you can easily use the stovetop or microwave too.
If you go the stovetop or microwave route, you’ll want to heat up your milk until it’s hot, but not boiling. I’m not going to specify on time, because everyone’s stovetop and microwave are different. But you’ll basically want to keep a close eye on your milk either way.
In the microwave, I’d recommend pulling it out and checking it every 15-20 seconds and once it’s steaming, pulling it.
On the stovetop, it will take a bit longer, so I’d recommend checking every 30-60 seconds to see if it is steaming (or to the temperature you like it.) Remember to pull it off the heat before it starts boiling!
(It’s not the end of the world if your almond milk starts boiling on the stove or in the microwave… It will just make it much longer until it’s at a drinkable temperature for you to enjoy.)
A good ratio of milk to coffee is typically 6-8 fl oz milk per espresso shot. If you like stronger tasting lattes, go a little lighter on the milk.
2. pull your espresso shot(s)
To make espresso at home, you’ll need to buy an at-home espresso machine. I, for one, thought I would never be able to afford an at-home espresso machine. After working at Starbucks for years and using the big, expensive espresso machines, I assumed all espresso machines were that big & pricey. But that’s simply not the case.
The espresso machine I’ve been using for the past year or so is a $50 machine from Amazon. (I believe it’s on sale for even less now.) It works like a charm and I’ve never had any problems with it.
I’m no coffee connoisseur, so I can’t tell the difference between the espresso from this machine and the espresso you’d get from a nicer/expensive machine. (If you’re a coffee guru, you may be able to, but for a typical person who just likes coffee, they taste nearly identical.)
As I mentioned above, you’ll want to use about 8 fl oz of milk per shot of espresso. I like my lattes strong, so when I make them I typically do 8 oz almond milk with 2 espresso shots.
To see an easy step-by-step walkthrough of how to use the Sowtech espresso machine & pull espresso shots, watch my 5-minute video above.
3. add in any creamer or flavors you like
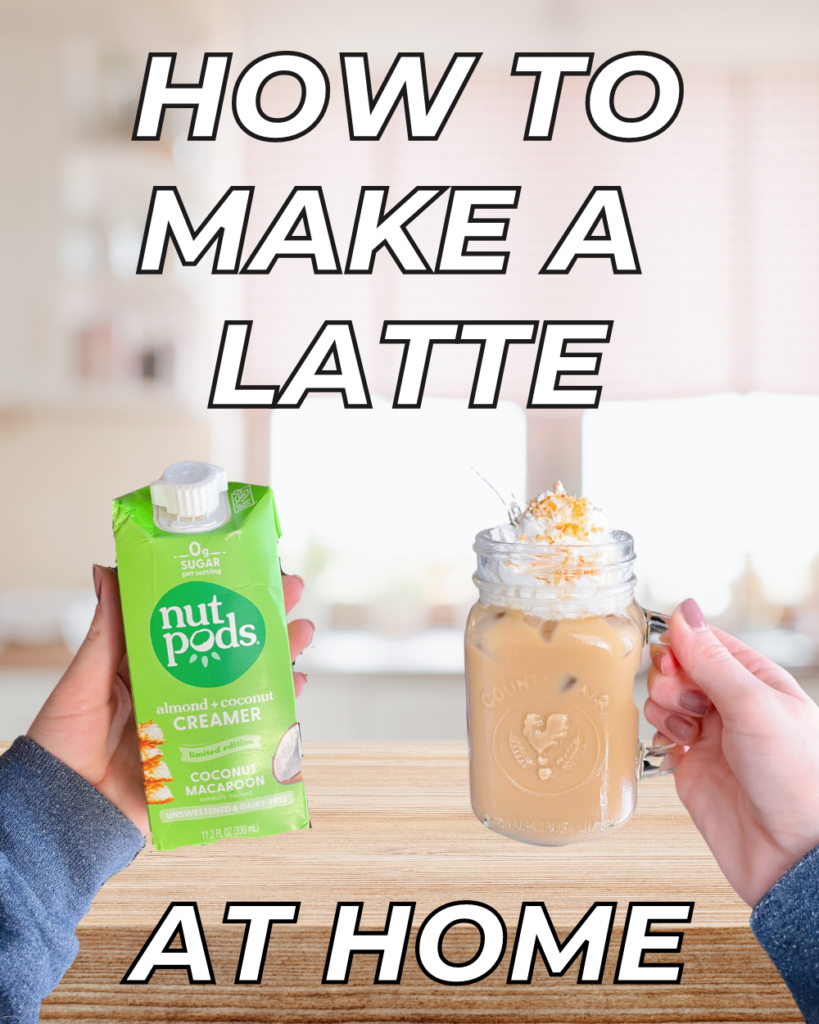
For my lattes, I always use nutpods dairy-free creamer. It’s vegan, sugar-free, and no artificial sweeteners, but somehow still tastes amazing! I vary between a bunch of different flavors (they have crazy ones like cotton candy, toasted marshmallow, and coconut macaroon.) But my OG nutpods flavors are vanilla and original. *Use code vitalityvixens for 15% off!*
I’ll just pour in about 2 oz of creamer and that’s the perfect amount of creaminess for me. Use however much you like! This step is all about personal preference.
4. Froth it up (Optional)
If you want a café-style latte, you’ll definitely want to invest in a milk frother. (I’m using the word invest very loosely. The milk frother I have is $12.)
With my milk frother (linked above) you simply place it in the cup of liquid, press the button on top, and let it do the work for you. You’ll have a frothy latte in about 10 seconds!
If you want to streamline your latte-making process, they also have milk frothers that do the steaming for you, like this one! This is going to be my next coffee-related purchase because I’m all about convenience.
How to Make an Iced Latte at Home

1. PULL YOUR ESPRESSO SHOT(S)
You’ll want to use about 6-8 fl oz of milk per shot of espresso. I like my lattes strong, so when I make them I typically do 8 oz almond milk with 2 espresso shots.
I use the Sowtech espresso machine to make my espresso at home. It’s easy to use, durable (in my experience this past year), and incredibly affordable compared to other espresso machines.
Check out the 5-minute video above for a quick step-by-step walkthrough of how to use the Sowtech espresso machine and pull espresso shots at home.
2. fill up a cup with ice
I use these mason jars whenever I make my iced lattes. I always eyeball the amount of ice that goes in, but it typically fills the cup up about halfway.
Once you have your cup filled (or half filled) with ice, pour your espresso shots on top.
I’ve been using these cute ice trays to make my ice lately. I don’t know about you, but I love using smaller ice cubes (or the nugget ice you get at Sonic/Chick-fil-a.) I’m not sure if it actually changes anything at all, but it sure feels like it tastes 10x better!
3. pour in your milk and creamer of choice
Like I said above, I use about 6-8 fl oz of almond milk per 2 espresso shots (my go-to is Califia unsweetened vanilla almond milk.) If you like a less strong latte, just use one espresso shot!
As far as creamer goes, I use about 2 fl oz of nutpods vegan coffee creamer. (Use code vitalityvixens for 15% off!) My go-to is either vanilla or original but lately I’ve been obsessed with the toasted marshmallow & coconut macaroon flavors. They’re all sugar-free with no artificial sweeteners, but somehow still taste so dang good!
4. stir and enjoy!
I use a reusable metal straw to stir up my iced latte and drink it up! If you’re feeling extra spicy, you can top your latte with whipped cream, cinnamon powder, or whatever else you like.
Final Thoughts
I hope you found this “how-to” helpful and are feeling more confident about making your own latte at home! If you have any questions or thoughts, drop them below in the comments. I love hearing from you guys and will always respond to kind comments/questions!
P.S. If you need some fun latte inspo, check out a few of my other hot/iced latte recipes below!
- Healthy Nutella Mocha (Vegan/Gluten-Free)
- Iced Honey Vanilla Latte (Vegan/Gluten-Free)
- Pumpkin White Chocolate Mocha (With Oat Milk)
Disclosure: This post contains affiliate links, from which we may earn a small commission (with no extra cost to you). Thank you for your support!
Come connect with us on:


